Showing posts with label DIY. Show all posts

Monday, November 29, 2010

Easy Christmas Decoration Ideas

The outdoor urns have been transformed with bronze branches, poinsettias and pussy willows. The wreath is made from glass bronze ornaments, birds and butterflies.
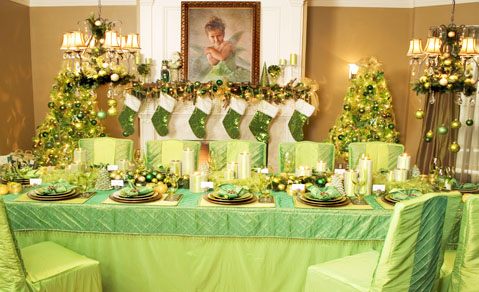
I created this Christmas tablescape using reds, greens and silver tones to coordinate the centerpiece. Add a large ribbon for an extra hit of colour.
I replaced a few framed pictures with a simple wreath and added a Christmas arrangement.
I created another arrangement for the coffee table. A mirrored picture frame adds sparkle power to candles. Inexpensive Christmas balls are another simple and easy way to decorate.
A simple garland is made from olive branches, which are symbolic in Christ's life (and represent peace as well) are wrapped around the banister with a wired ivory ribbon. A handmade wreath is hung from the banister rails, proving that wreaths can be hung anywhere and not just on doors!
This is also a great Christmas card idea. I drew a tree and filled it in with words that came to mind when I thought about Christmas and what it meant to me. You can do the same with any shape.

Tuesday, November 23, 2010

Roses n Lollipops Holiday Floral Designs

With the holidays coming up, I thought i'd post some inspiration for holiday table designs. These pictures are from the talented celebrity floral designers, Roses n Lollipops, who have designed tablescapes for the likes of Lance Bass, Kathy Griffin and Shaquille O' Neal.
TIP: Don't forget that if you're filling your table with candles, florals or Christmas ornaments, you'll need to set up a buffet elsewhere or serve each guest individually.


I love the use of these rustic reindeer and candle holders with blue accents.


Wednesday, May 26, 2010

Bridal Shower DIY and "No Sweat" Menu Planning

Recently some friends and I threw our friend Angela a bridal shower. I wanted to show you some pictures and a great DIY project that I came up with. I picked the theme and look of the shower up from her wedding invitations, which had a damask design. I found these wall decals from the dollar store and picked up a roll of white paper gift wrap.
I placed them onto the paper and voila- an instant custom table runner!
I made a large faux flower arangement for the centerpiece, and scattered real cymbidum orchids on the table.
When planning the menu, try mixing pre-made items with freshly made items. I purchased several cakes and tarts from a local bakery including the lemon curd cheesecake and key lime wild blueberry tart. A large serving platter of fresh fruit is always a "no-cooking" required idea!
Debbie made two fresh sandwich varieties: a roast chicken, strawberry and arugula sandwich, and adorable mini smoked salmon bagels with spinach lemon cream cheese.
A couple of other "no-sweat" menu included two bite brownies piped with fresh buttercream frosting, and a cake stand piled high with profiteroles from Costco. If you have extra time, you can make spun sugar and you've got an instant croquembouche!

Monday, May 3, 2010

Faux Flowers No Longer a Faux Pas!

Years ago, if you had mentioned the use of faux or silk flowers in a wedding, it would have been a massive faux pas (no pun intended). Nowadays, you would be amazed at how realistic and beautiful faux flowers can be, and how many top designers incorporate them into their designs. Although nothing can replace the fragrant smell of fresh flowers, faux flowers can be wonderful to design with. They are easily manipulated and don't wilt like their fresh counterparts. Arguably, they could also be considered eco-friendly!An arrangement I made with faux peonies, roses and parrot tulips.
I've been working on the design of my friend Ada's wedding, and for the ceremony, I have the task of filling a large modern church on a tight budget. One of the stipulations of the contract was that fresh flowers were not to be used on anywhere there is carpet, so I ran to some faux flower suppliers in Mississauga over the weekend. I'll be posting more photos but here's a sneak peak! My living room's a bloom with the flowers for the wedding!
I got these gorgeous plum-lavender hydrangeas and bundled them with sprigs of lavender for the pews... i've got great plans for the pews!

Sunday, April 4, 2010

Chic Bake Sale

Just wanted to share these photos of a bake sale that we had last month to benefit the Nicaragua Missions team, proving that fundraisers can be chic and cute too!
I piped mint green buttercream frosting and made little fondant ladybugs. Above - I cut freehand fondant hearts, and dusted lemon cupcakes with powdered sugar.
Caramel filled chocolate mini cupcakes: I cut rolled pink fondant with Japanese vegetable cutters and put them on a bed of pink buttercream.
Packaging makes a huge difference: have cello bags and boxes handy to package baked goods. People want to be able to take things home easily or give them as gifts. I also made branded labels to make pricing easy and uniform.

Thursday, January 21, 2010

Show Love in the Details...

On my second day off this week, I decided to the Celebrate Beautifully email and was completely blown away by the amount of emails, requests and wonderful compliments. I just wanted to say thank you to everyone who's reading my blog. I am completely flattered and I promise to try to keep posting! Actually when I first started this blog, the intent was to show the step by step process of planning my own wedding.
Turns out I didn't have the time to do that, so here is one DIY project I did to make up for it!
Project: Seating Card & Response Card Display
To make the seating card display, I made a base out of white foam, and wove together faux grass, leaving space for the Response Card display.
I hot glued cream ranunculus blossoms (a flower echoed in our bouquets) and green leaves to hide the foam base. Then I hot glued each seating card (with their name and table number*) onto bamboo stakes and stuck them in the base.
*hint: Pre-print all the names, but dont write in the table numbers until 1 week prior in case of last minute changes.
Our florist provided this gorgeous manzanita tree and we hung all the response cards of the guests. We printed a banner that said "Thank You for Saying Yes!" for the base of the tree which was nestled in a bed of pink roses. It was a great way to welcome our guests to our wedding!